

One-point perspective sketching is a fundamental skill for artists, designers, and architects. Whether you are a beginner aiming to improve your drawing techniques or an advanced illustrator refining your spatial compositions, understanding the principles of one-point perspective is essential. This comprehensive guide covers everything you need to know—from the basics to advanced methods—to help you create realistic, proportionate, and visually compelling sketches.
Table
- What is One-Point Perspective Sketch?
- Why One-Point Perspective is Important
- Essential Tools for One-Point Perspective Sketching
- Step-by-Step Guide to Creating a One-Point Perspective Sketch
- Common Mistakes to Avoid
- Applications of One-Point Perspective
- Advanced Techniques for One-Point Perspective Sketches
- Helpful Tips from Experts
- Recommended Resources for Learning One-Point Perspective
What is One-Point Perspective Sketch?
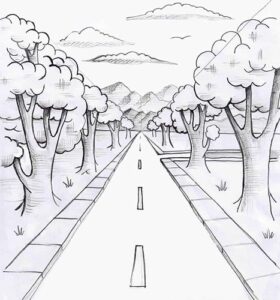
A one-point perspective sketch is a drawing technique where all parallel lines converge to a single vanishing point on the horizon line. This technique is used to represent three-dimensional objects on a two-dimensional surface accurately. It is commonly applied in architectural drawings, interior designs, urban landscapes, and even conceptual art.
Key Characteristics:
- Single vanishing point
- Parallel lines recede toward this point
- Objects appear smaller as they move further away
- Horizon line defines the viewer's eye level
This technique allows artists to create depth and realism in their sketches, making it an indispensable tool for both traditional and digital art.
Why One-Point Perspective is Important
Understanding one-point perspective enhances your drawing skills in several ways:
- Realism: Accurately portrays depth, proportion, and spatial relationships.
- Consistency: Ensures objects remain aligned and proportionate as they recede.
- Versatility: Useful for landscapes, interiors, cityscapes, and product designs.
- Foundation for Advanced Techniques: Forms the basis for two-point and three-point perspectives.
Many beginner artists struggle with making objects appear convincingly three-dimensional. Mastering this method provides a strong foundation to tackle more complex scenes.
Essential Tools for One-Point Perspective Sketching
Before starting, having the right tools can significantly improve your workflow. Common tools include:
- Pencils: HB or 2B for sketching outlines; softer pencils (4B, 6B) for shading.
- Ruler or Straightedge: Essential for drawing accurate converging lines.
- Eraser: For correcting mistakes and refining lines.
- Sketchbook or Drawing Paper: Smooth paper allows clean lines.
- Digital Tools: Software like Adobe Illustrator or Procreate allows precise perspective guides.
Using quality tools enhances precision and saves time, particularly when creating complex compositions.
Step-by-Step Guide to Creating a One-Point Perspective Sketch
Here’s a structured process to create your first one-point perspective sketch:
Step 1: Draw the Horizon Line
The horizon line represents the viewer's eye level. Draw a horizontal line across your paper to indicate this.
Step 2: Place the Vanishing Point
Select a single point on the horizon line as your vanishing point. All parallel lines will converge toward this point.
Step 3: Draw Basic Shapes
Start with simple geometric shapes (cubes, rectangles) and extend their edges toward the vanishing point. This ensures accurate depth.
Step 4: Refine the Sketch
Add details like windows, doors, furniture, or street elements. Always align the edges toward the vanishing point for consistency.
Step 5: Add Texture and Shading
Shading enhances the 3D effect. Objects closer to the viewer should be darker and more detailed, while distant objects appear lighter and less defined.
Step 6: Final Touches
Erase unnecessary lines, refine edges, and enhance contrast. The final sketch should appear balanced and proportional.
Common Mistakes to Avoid
- Misplacing the vanishing point
- Ignoring the horizon line
- Misaligning receding lines
- Using inconsistent object sizes
- Overcomplicating the sketch with too many details
Avoiding these errors ensures your sketch remains realistic and visually appealing.
Applications of One-Point Perspective
Architectural Drawings
Architects use this technique to draft interiors and building exteriors, ensuring accurate proportions and depth.
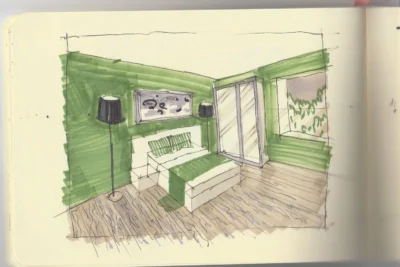
Interior Design
Designers create layouts that reflect realistic room dimensions, making it easier to visualize furniture placement.
Urban and Landscape Art
Cityscapes, streets, and landscapes gain a realistic sense of space using one-point perspective.
Concept Art
Digital artists use it to design immersive environments, from futuristic cities to fantasy landscapes.
Advanced Techniques for One-Point Perspective Sketches
1. Overlapping Objects
Layering objects creates depth and realism. Ensure each object follows perspective rules.
2. Curved Surfaces
For objects like domes or arches, divide the surface into smaller sections that align toward the vanishing point.
3. Dynamic Composition
Place the vanishing point off-center to create a more engaging and dynamic sketch.
4. Atmospheric Perspective
Introduce lighter tones and softer edges for distant objects to simulate atmospheric effects.
5. Multiple Vanishing Points
Transition into two-point perspective for more complex scenes while maintaining mastery of the one-point method.
Helpful Tips from Experts
- Start Simple: Focus on cubes and rectangles before attempting complex structures.
- Use Guidelines: Light guidelines help maintain consistency.
- Study Real Life: Observe streets, hallways, or buildings to understand perspective in reality.
- Digital Assistance: Digital tools like perspective grids can speed up the learning curve.
- Practice Regularly: Consistent sketching improves precision and confidence.
According to Drawspace, regular practice in perspective drawing significantly enhances spatial awareness and artistic accuracy.
Recommended Resources for Learning One-Point Perspective
- Books: Perspective Made Easy by Ernest R. Norling
- Online Tutorials: Proko Perspective Tutorials
- Software: Adobe Illustrator, Clip Studio Paint, Procreate (with perspective grids)
- Communities: Art forums like DeviantArt and ArtStation for feedback and inspiration
These resources provide structured learning, real-life examples, and expert advice to accelerate your mastery.
Mastering a one-point perspective sketch is an essential skill for artists, designers, and architects. By understanding the principles, practicing regularly, and applying advanced techniques, you can create realistic and visually compelling sketches. From architectural designs to digital concept art, this method forms the foundation of three-dimensional representation on a two-dimensional canvas.
Start simple, observe real-life scenes, and gradually challenge yourself with more complex compositions. Over time, your sketches will not only be precise and proportionate but also aesthetically captivating.
Cosmetic Painting: Techniques, Applications, and Professional Tips
Frida Kahlo: The Life, Art, and Legacy of a Revolutionary Icon 🎨✨

The Greatest Artists in History: Lives, Styles, and Influence

The Ultimate Guide to Abstract Expressionism: Origins, Key Artists, and Impact 🎨🖌️
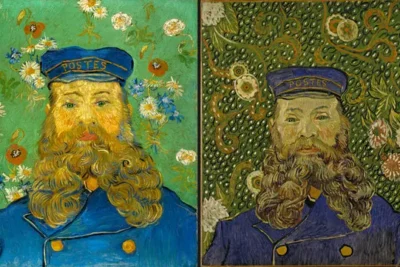
Van Gogh in Design: Inspiration, Techniques, and Modern Applications
9 Common Mistakes in Perspective (and How to Fix Them)
Leave a Reply