Discover how Renaissance and Baroque painters created luminous, three-dimensional masterpieces through the timeless techniques of layering and glazing.
Table 🪞 TL;DR 🎨 Introduction: The Secret Language of Light 🧱 What Is Layering in Painting? 💎 What Is Glazing? 🧪 Step-by-Step: How to Use Layering and Glazing 🔬 Optical Illusion: Why These Techniques Work 🧠 Tips from the Old Masters (Modernized) 🌍 Layering and Glazing in Modern Art 💬 FAQs About Layering & Glazing 🖼️ Conclusion: Reviving the Old Masters’ Magic
🪞 TL;DR
Layering and glazing are traditional painting techniques that involve applying thin, semi-transparent layers of paint to create depth, luminosity, and realism. Used by Old Masters like Vermeer, Rembrandt, and Titian, these methods allow light to travel through layers of color, giving the illusion of glowing, lifelike surfaces. Today, modern artists adapt these same principles to oils, acrylics, and even digital painting for richer, more dynamic results.
🎨 Introduction: The Secret Language of Light
When you stand before a painting by Rembrandt or Vermeer, you can almost feel the light emerging from within the canvas.
That luminous glow — a candle flickering on skin, sunlight on satin — is not magic; it’s technique. Specifically, layering and glazing, two methods that shaped centuries of painting.
Unlike modern direct painting (alla prima), the Old Masters built their compositions gradually. Every translucent layer contributed to how light interacted with pigment, creating a depth and richness impossible to achieve in a single coat.
Understanding these methods doesn’t just honor tradition — it offers a powerful toolkit for any artist who wants to make their colors breathe.
🧱 What Is Layering in Painting?
Layering is the process of applying multiple coats of paint, one on top of another, allowing each to dry before the next is added.
Each layer modifies what’s beneath it — adding opacity, altering tone, or refining form.
Key Concepts:
- Underpainting (Grisaille or Imprimatura):
A monochrome foundation that defines value, contrast, and composition.
Example: Vermeer’s soft blue-gray underpainting set the stage for his luminous interiors. - Body Color Layers:
Opaque pigments applied to establish mid-tones and local color. - Detail and Highlight Layers:
Finer brushwork adds depth, textures, and focal points.
Why Layering Matters:
- It helps artists control color temperature gradually.
- It maintains the structural integrity of the composition.
- It mimics the natural optical blending of light and pigment.
Think of layering as constructing a visual symphony — each coat adds a note, building toward harmony and resonance.
💎 What Is Glazing?
Glazing is a technique where transparent paint is applied over dried, opaque layers.
Each glaze subtly shifts the color below without covering it, producing a deep, luminous effect.
The word “glaze” comes from “glas,” meaning glass — fitting, since the technique creates surfaces that seem to glow from within.
The Science of Glazing:
- A transparent pigment is mixed with a medium (oil, resin, or acrylic gloss).
- Light passes through the glaze, hits the underlying layer, and reflects back.
- The result is a refracted color that changes based on viewing angle and light intensity.
Famous Examples:
- Rembrandt’s portraits: Warm glazes over cool shadows create lifelike skin tones.
- Titian’s fabrics: Layered reds and golds shimmer under gallery lights.
- Da Vinci’s sfumato: Ultra-thin glazes blur edges, giving softness to forms.
🧪 Step-by-Step: How to Use Layering and Glazing
🖌️ 1. Prepare Your Ground
Start with a smooth, toned surface (often a gessoed panel or primed canvas).
An imprimatura — a thin, neutral wash — prevents harsh white reflections and unifies the palette.
🎭 2. Create the Underpainting
Work in monochrome to establish composition, value, and light direction.
Traditional tones include raw umber or Payne’s gray.
This is your painting’s skeleton.
🎨 3. Build with Opaque Layers
Add your main colors and mid-tones. Use more pigment, less medium.
Allow full drying between coats to avoid muddiness.
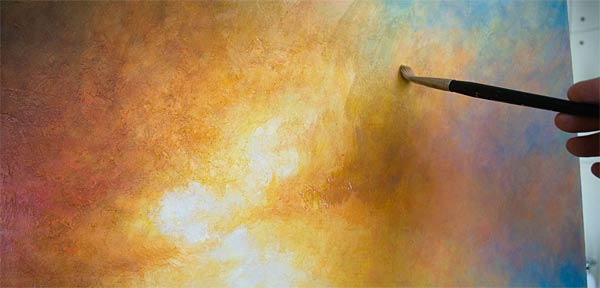
💧 4. Apply Glazes
Mix transparent pigment with a medium such as:
- Linseed oil (for oils)
- Gloss medium (for acrylics)
- Damar or alkyd (for faster drying)
Apply in thin, even coats, letting each one dry completely.
Multiple glazes can transform a dull area into radiant color depth.
✨ 5. Finishing Touches
Use final highlights sparingly and preserve the luminosity built beneath.
A final varnish can unify sheen and protect your layers.
🔬 Optical Illusion: Why These Techniques Work
Light behaves differently when it passes through translucent layers.
Each glaze acts as a filter, bending and scattering wavelengths, which the human eye perceives as richness and depth.
That’s why the reds in Titian’s robes feel alive — the light literally bounces between microscopic layers of pigment before reaching your eyes.
In modern terms, it’s the analog equivalent of color grading in cinema: subtle, cumulative, transformative.
🧠 Tips from the Old Masters (Modernized)
| Old Master Principle | Modern Application |
|---|---|
| “Fat over lean” – each layer more oily than the last | Prevents cracking and uneven drying in oil paintings |
| Use natural light for color accuracy | Use daylight or full-spectrum bulbs when painting |
| Patience is key – let layers cure | Allow 24–72 hours drying time between glazes |
| Control your medium, don’t let it control you | Measure ratios carefully: too much medium = gloss, too little = drag |
🌍 Layering and Glazing in Modern Art
Though rooted in tradition, these techniques have found new life:
- Hyperrealists use glazes to simulate skin translucency and reflections.
- Digital painters replicate glazing with opacity layers in Photoshop or Procreate.
- Abstract artists employ glazing to reveal color histories beneath the surface.
Whether on canvas or screen, the principle remains the same: depth through transparency.

💬 FAQs About Layering & Glazing
Q1: Can I use these techniques with acrylic paint?
Yes — modern acrylic mediums are designed for glazing. Use gloss or glazing liquid for the best transparency.
Q2: How long should I wait between glazes?
For oils: 24–48 hours. For acrylics: 15–30 minutes, depending on thickness.
Q3: What pigments are best for glazing?
Transparent ones like alizarin crimson, ultramarine blue, or sap green. Avoid opaque colors like cadmium yellow.
Q4: Can beginners use glazing effectively?
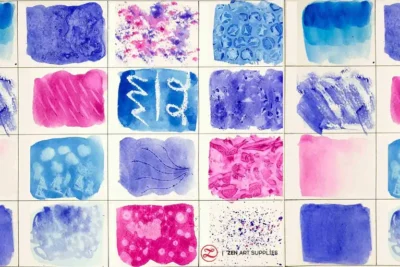
Absolutely. Start with simple tonal glazes to observe how color changes with each coat.
Q5: Is varnish considered a glaze?
No — varnish is a protective final layer, not a working paint medium.
🖼️ Conclusion: Reviving the Old Masters’ Magic
Layering and glazing aren’t relics of the past — they’re living tools of artistic expression.
By mastering transparency and patience, you can capture the same inner glow that once illuminated Renaissance canvases.
As the saying goes among painters:
“The magic isn’t in the paint — it’s in the layers between.”
Understanding Perspective in Art: A Beginner’s Guide in 2025
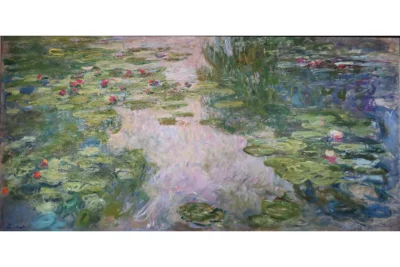
Famous Paintings: Exploring Iconic Artworks and Their Stories
7 Art Techniques: Mastering Artistic Methods for Beginners and Professionals
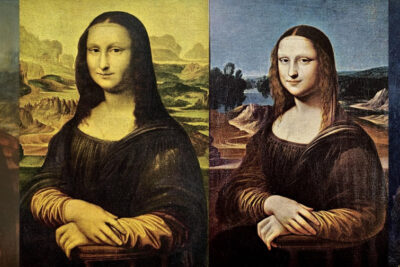
Versions Mona Lisa: Interpretation, Replica, and Reinvention of the Iconic Masterpiece
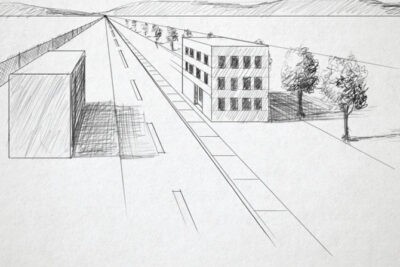
Mastering One-Point Perspective Sketch: Techniques, Tips, and Best Practices
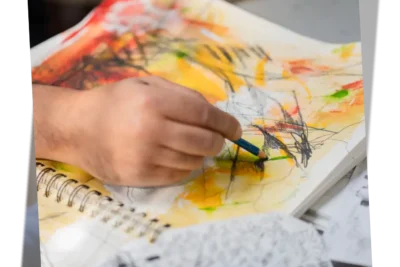
Mixed Media: Breaking the Boundaries Between Materials
Leave a Reply